Here we go again! I'll actually let the hide decide for me what to do with it.
After several days in the borax + water bath, out to the back garden it goes, for some dehairing process. Whether or not I degrain it depends on the skin. But before we start, we need to get a beam set up. Since I'm quite the short bastard, the beam is quite small, made out of old futon frame and a 7.5 cm diameter (3 inches) PVC pipe, of about 1.2 meters length.
 |
| The wooden base where the pipe slides onto. |
Right, so we get the hide, wash it and rinse it one more time. Bath tub works just fine...
 |
Drape the deer hide, hair side out, on the PVC pipe. Lean into the top of the beam to secure the hide between you and the PVC, then push down with a blunt knife.
The hair and grain layer should come off. Be patient, though, as you can easily tear into the skin! I know I did, quite a lot of times. Need to make me a draw knife, I guess.
 |
| You can see the roots of the hair in the grain layer. scrapey scrapey! |
 |
| Two bin bags full of deer hair! Left out a handful for the birds to use in spring. |
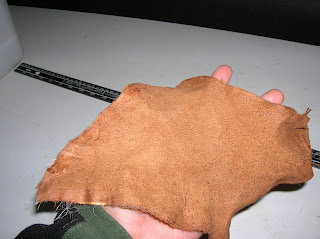
On the plus side, the little piece of dehaired and degrained belly skin turns out to be a real nice piece of suede-like leather:
 |
| grain side - soft suede-y texture |
 |
| Flesh side. Might tidy it up a bit with sandpaper. |
 |
| Velvety soft! Almost buckskin, considering I used tea to Saami tan it. |
Deer hock pouch
Deer hock pouch, iteration 2; with belt loop
How to skin deer legs for hockskins
Bark tanning hair on deer hide
How to remove the pasterns and coffin bone from a deer foot
Salt Curing deer hides for storage
How to degrease deer bones for making tools
Soap/Oil tanning hoof-on, hair-on, Mule Deer hockskin


No comments:
Post a Comment